Ontwikkelomgeving
Voor het ontwikkelen en testen van toolchains is het handig om dit op je eigen systeem te doen. Echter, je wilt niet je systeem “vervuilen” met allerlei installaties. Ook is het dan lastig om een werkende toolchain over te dragen aan de werkelijke test/produktie server, bijv als je op Mac OSX of Windows werkt of een oudere Ubuntu.
Daarom wordt steeds meer met virtualisatie gewerkt, ook op lokale systemen als bijv Mac OSX. Ik beschrijf hieronder mijn werkwijze om op Mac OSX met Ubuntu 12.10 te ontwikkelen en testen.
Er zijn hierbij twee onmisbare tools:
- VirtualBox, zie http://www.virtualbox.org
- Vagrant, zie http://www.vagrantup.com
Dit blijkt een gouden combinatie te zijn, ook als je niet met Puppet of Chef werkt. Dan is Vagrant helemaal handig, maar gebruik van Puppet of Chef hoeft dus niet in eerste instantie.
Hoewel VirtualBox natuurlijk op zichzelf is te gebruiken, voegt Vagrant juist extra handigheden toe, met name om lokaal gemakkelijk met je VMs, “boxes” geheten in Vagrant, te werken, bijv.
- snel VMs downloaden, in de lucht krijgen
- gemakkelijk port forwarden, m.n. voor SSH en je browser
- gemakkelijk lokaal inloggen
- evt “boxes” delen met elkaar
- files delen via shares, /vagrant is altijd aanwezig
Installaties
Zie http://docs.vagrantup.com/v1/docs/getting-started/index.html
VirtualBox
Laatste versie (in feb 2013: v4.2.6) downloaden en installeren. Zie https://www.virtualbox.org/wiki/Downloads. Ook de extension packs installeren.
Vagrant
Voor Mac OSX http://downloads.vagrantup.com/tags/v1.0.6. Maar kan op Lunix OS-es simpeler, of via RubyGems,
gem install vagrant (Vagrant is in Ruby ontwikkeld). Feb 2013: 1.0.6 installed.
Werken met Vagrant Boxes
Box Aanmaken
Belangrijkst is om een begin te maken met goede “box”, een VM image die door Vagrant geconfigureerd wordt.
Zie boxes o.a. hier: http://www.vagrantbox.es
We kiezen een Ubuntu 12.10 Server image: http://cloud-images.ubuntu.com/quantal/current/quantal-server-cloudimg-vagrant-amd64-disk1.box
Om bijv. een headless Ubuntu 12.10 server up en running in enkele minuten. Doe in lege directory.
vagrant box add quantal64-server http://cloud-images.ubuntu.com/quantal/current/quantal-server-cloudimg-vagrant-amd64-disk1.box
vagrant init
vagrant up
Dit voegt een nieuwe VM toe aan VirtualBox.
Een file genaamd VagrantFile wordt aangemaakt in de directory waar je de box aanmaakt als boven.
Deze file bevat config info over je Box, bijv hier de “quantal64-server”.
# -*- mode: ruby -*-
# vi: set ft=ruby :

Vagrant::Config.run do |config|
  # All Vagrant configuration is done here. The most common configuration
  # options are documented and commented below. For a complete reference,
  # please see the online documentation at vagrantup.com.

  # Every Vagrant virtual environment requires a box to build off of.
  config.vm.box = "quantal64-server"

  # The url from where the 'config.vm.box' box will be fetched if it
  # doesn't already exist on the user's system.
  # config.vm.box_url = "http://domain.com/path/to/above.box"

  # Boot with a GUI so you can see the screen. (Default is headless)
  config.vm.boot_mode = :gui

  # Assign this VM to a host-only network IP, allowing you to access it
  # via the IP. Host-only networks can talk to the host machine as well as
  # any other machines on the same network, but cannot be accessed (through this
  # network interface) by any external networks.
  # config.vm.network :hostonly, "192.168.33.10"

  # Assign this VM to a bridged network, allowing you to connect directly to a
  # network using the host's network device. This makes the VM appear as another
  # physical device on your network.
  config.vm.network :bridged

  # Forward a port from the guest to the host, which allows for outside
  # computers to access the VM, whereas host only networking does not.
  config.vm.forward_port 80, 8090

  # Share an additional folder to the guest VM. The first argument is
  # an identifier, the second is the path on the guest to mount the
  # folder, and the third is the path on the host to the actual folder.
  # config.vm.share_folder "v-data", "/vagrant_data", "../data"

  # Enable provisioning with Puppet stand alone.  Puppet manifests
  # are contained in a directory path relative to this Vagrantfile.
.
.
end
Inloggen op je box
vagrant ssh
De box down brengen doe je met.
vagrant halt
Mocht je nu je box “verklooid” hebben dan kun je weer schoon starten via.
vagrant destroy
Notes:
- als je bent ingelogd via
vagrant sshkun je viasudo su -root worden - in settings binnen VB: zet op 64-bits en NW Adapter1 via en0
- set networking in VB to NAT to enable 2222->22 SSH forwarding
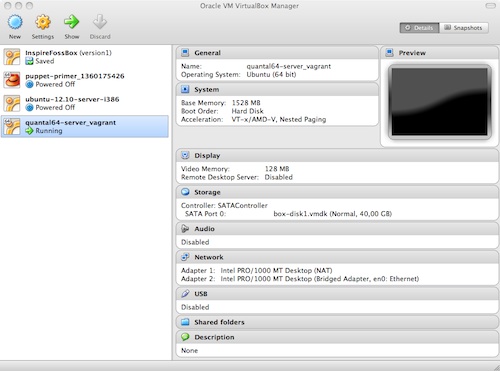
Figuur ONT-1 - VirtualBox Screenshot
Werken met je Box
Je kunt de VM natuurlijk starten vanuit VirtualBox, maar heel handig is om je VM Box te zien als een remote
headless server en deze vanuit SSH te benaderen. De directory waar je in staat is als /vagrant gemount binnen je box
als je inlogt.
Inloggen op je box (vanuit dir waar VagrantFile staat
vagrant up
vagrant ssh
Als je op je box bent ingelogd kun je verder werken als normaal.